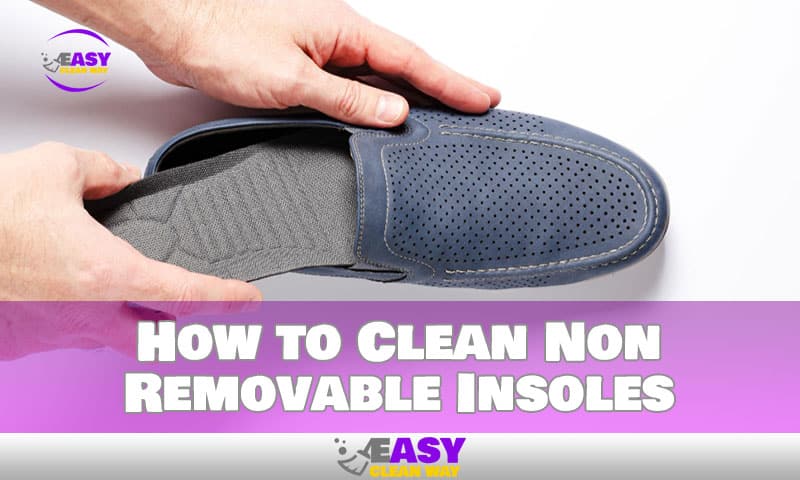
Have you ever had to suffer through the discomfort of wearing a pair of shoes with dirty, smelly insoles? If so, then you know how important it is to keep your insoles clean and free from odors—and, unfortunately, that can be difficult if the insoles are non removable. But don’t worry, there’s still hope!
In this article, we’ll show you the steps for cleaning non removable insoles in just a few easy steps. We’ll even share some tips and tricks on how to keep them from getting dirty in the first place! So don’t wait another minute—let’s get started with our step-by-step guide on how to clean non removable insoles.
What You’ll Need for Cleaning Non Removable Insoles
First things first, let’s go over the supplies that you’ll need in order to clean your non-removable insoles. To get started, you’ll need an old toothbrush, a small bucket with warm soapy water, a mild liquid detergent, and some white vinegar. This combination of ingredients will help to effectively lift dirt and grime from the surface of your insoles.
To remove any extra soap and water from the bottoms of your shoes, you’ll also need a clean rag or towel. You may also use any specific shoe cleaners that you may have. Last but not least, be sure to have a soft bristles brush on hand. This is perfect for removing those tough stains and spots.
Preparing Your Shoes for Cleaning Non Removable Insoles
Now that you’re ready to tackle the task of cleaning your non-removable insoles, it’s time to get your shoes prepped! This involves a few steps that help ensure the cleaning process is as effective as possible.
First, start by removing any visible dirt or debris from the outside of your shoes. Use a soft brush and some mild soap and water if necessary. Then, tap out any remaining dirt from inside the shoe, being sure to reach all those hard-to-reach places.
It’s time to start removing the insole once the outside of your shoes have been thoroughly cleaned and dried. Make sure you have a pair of scissors on hand to remove any remaining tenacious glue. Once that’s taken care of, you can start sprucing up your shoes and cleaning your insoles!
Step-by-Step Guide to Cleaning Non Removable Insoles
You don’t need to be a certified expert to clean your insoles—you just need the right materials and know-how. Here’s an easy step-by-step guide to cleaning your non-removable insoles:
Materials Needed
- Mild detergent
- Water spray bottle
- Clean cloth for wiping and scrubbing
- Toothbrush
- Baking soda paste
Steps
- Begin by removing as much dirt as possible from the surface of the insole by wiping it with a damp cloth. This can help prevent dirt and soil from grinding down into the crevices of the insole during cleaning.
- Spray some mild detergent onto a clean cloth and rub it along the surface of the insole, focusing on any areas with remaining dirt or soil stuck to them. If there is still dirt remaining, use a toothbrush dipped in soapy water to tackle those problem areas.
- For any stubborn stains, blend some baking soda with some water to create a paste and apply this paste to stains using a toothbrush. Allow the paste to sit on stubborn stains for around 15 minutes before brushing it away with a damp cloth.
- Finally, rinse away all soap residue by lightly spritzing the insoles with water and wipe them down with a clean cloth until all residue is gone before leaving them to air dry completely before putting them back into shoes.
Tips for Keeping Non Removable Insoles Clean Longer
Nobody likes wearing shoes with smelly insoles. That’s why it’s important to keep your non-removable insoles clean and smelling great, no matter how often you wear your shoes. Here are some tips to help you keep your non removable insoles clean longer:
Air them out
Whenever possible, take the time to air out your shoes after wearing them. This will help prevent moisture, bacteria and odor from building up inside the shoe. Don’t forget to also take out the insoles if they can be removed and leave them barefoot overnight.
Use a deodorizing powder
If you have worn your shoes for several days in a row, sprinkle a bit of deodorizing powder—cornstarch or baking soda work great—on the insole before putting your shoe back on. The powder will absorb moisture, reducing odor and bacteria build up over time.
Use Vinegar/Baking Soda Mixture
Another simple trick is to make a paste using equal parts white vinegar and baking soda and apply it to the insoles with a damp cloth. Let sit overnight then rinse with cold water and let dry before putting the shoe back on. This method is perfect for getting rid of stubborn odors that have been sticking around for awhile.
By taking these steps each time you wear your non removable insoles, you can ensure that they remain fresh smelling for as long as possible!
Best Practices for Storing and Drying Non Removable Insoles
When the insoles are dry, the best practice is to store them in a cool, dry place. This will help avoid any mildew from forming. Additionally, avoid storing the insoles in direct sunlight, as this can cause the material to fade or become brittle.
It’s a good idea to have a dedicated shoe rack that you can use for storing the insoles. Place them on the rack with plenty of space between different pairs of insoles, to ensure good airflow. That way, when the time comes to wear them again, they will be ready to go with no worries about odors.
Avoiding direct heat when drying non-removable insoles is essential. Avoid placing them in front of a fan or too close to a heater to prevent harm to the material. Using a hairdryer to hasten the drying process is also not a good idea.
Non-removable insoles can be dried most effectively by simply leaving them in a dry, well-ventilated area until they are totally dry. Depending on the material and the climate, this procedure may take a few hours to several days.
By following the steps above, you can ensure that your non removable insoles remain clean, smell fresh and feel great, regardless of how often you wear them. From using the right materials to taking the time to store and dry your insoles properly, these steps will
Alternatives to Cleaning Non Removable Insoles
If you’re in a rush and can’t take the time to properly clean your non removable insoles, there are a few alternatives. You can use a damp cloth to try and remove some of the dirt and grime, but it won’t help reduce odors and bacteria.
You might also freeze your non-removable insoles overnight in order to assist eliminate odor-causing microorganisms. Just keep in mind to remove them from the freezer the night before you intend to wear them again so they may thaw out and return to their normal shape.
Finally, if you have a pair of removable insoles, you can take them out of your shoe and hand-wash them in a solution of mild soap and water, air dry or use a deodorizer spray.
As you can see, there are plenty of options to help keep your non removable insoles clean and smelling fresh! Just remember to take the necessary steps to ensure that your insoles remain in good condition for as long as possible.
People Also Like: How to Clean Bowling Shoes Slide Strip in One Easy Step
Conclusion
Overall, cleaning non-removable insoles is a simple process that requires a few supplies and a little bit know-how. With the right tools and technique, you’ll have your insoles looking like new in no time. A clean insole not only looks better, but can help prevent odor, infection, and other foot-related issues. So, be sure to give your shoes the maintenance they need, as often as necessary. With regular cleaning, your insoles will look good and last longer.
Hey there! I’m Alton Smith, your Clean Expert blogger. I’m on a quest to help you conquer chaos and embrace the joys of a tidy life.