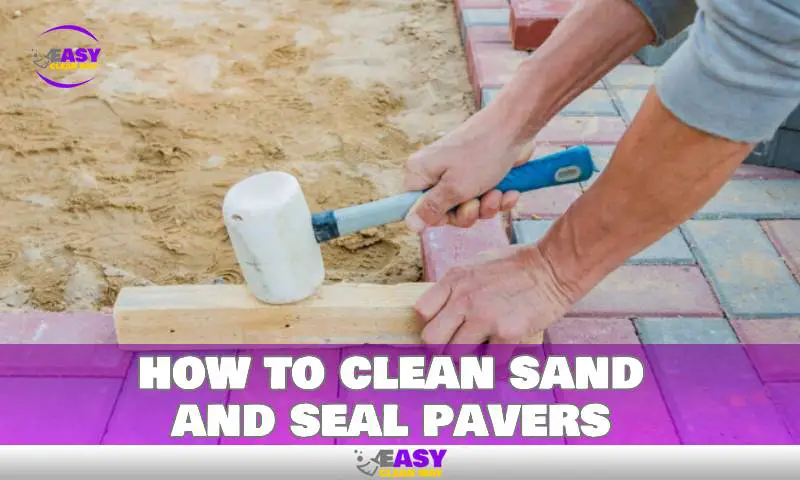
To clean and seal pavers, start by removing any debris and weeds from the surfaces. Next, use a power washer or hose to clean the pavers thoroughly.
Allow them to dry completely before applying a paver sealer using a brush or roller.
Why Maintaining Pavers Is Essential For A Beautiful Finish
Proper maintenance of pavers is crucial to ensuring that they remain visually appealing and in excellent condition. Neglecting regular cleaning, sanding, and sealing can lead to several issues, such as weed growth, moss and algae buildup, staining, and erosion. By following a maintenance routine, you can keep your pavers looking their best and extend their lifespan.
Here are some key points to consider:
- Prevent weed growth: Over time, weeds can grow between the pavers, causing damage and making the area appear untidy. Regular cleaning and sealing help to prevent weed growth, keeping your pavers clean and weed-free.
- Minimize dirt and stains: Pavers are exposed to various environmental factors, including dirt, dust, and stains from spills or organic matter. Cleaning them regularly removes dirt and stains, maintains their original color, and enhances their overall appearance.
- Enhance durability: Harsh weather conditions, foot traffic, and other elements can take a toll on pavers, causing erosion and damage. Sanding and sealing the pavers provides an added layer of protection, enhancing their durability and ensuring they withstand the test of time.
Benefits Of Regular Cleaning, Sanding, And Sealing
Regularly cleaning, sanding, and sealing your pavers offers numerous benefits for both the short and long term. Here are the advantages of incorporating this maintenance routine:
- Preservation of appearance: By regularly cleaning, sanding, and sealing your pavers, you can maintain their original look and preserve their natural beauty. This helps enhance the overall aesthetics of your outdoor space.
- Protection against weathering: Pavers are exposed to harsh weather conditions such as rain, heat, and cold, which can cause them to deteriorate over time. Cleaning, sanding, and sealing create a protective barrier that shields the pavers from weathering, preventing cracks, erosion, and discoloration.
- Long-term cost savings: Investing in regular maintenance saves you money in the long run. By preventing damage and extending the lifespan of your pavers, you avoid costly repairs or replacements.
- Easy maintenance: Following a routine cleaning, sanding, and sealing process simplifies the ongoing maintenance of your pavers. Regular maintenance requires less effort and time, making it easier to keep your outdoor space looking pristine.
Materials And Tools Needed For The Process
To properly clean, sand, and seal your pavers, you will need the following materials and tools:
- Cleaning solution: Choose a suitable cleaner specifically formulated for pavers. Ensure it is safe for the paver material and environment-friendly.
- Pressure washer or garden hose: Use a pressure washer or garden hose to rinse off dirt, debris, and cleaning solution from the pavers.
- Jointing sand: This special sand is used to fill the gaps between the pavers, providing stability and preventing weed growth.
- Sealer: Select a high-quality sealer designed for pavers. Consider the finish (matte or glossy) and choose the appropriate sealer based on your desired look.
- Applicator tools: Use a brush or roller to apply the sealer evenly on the surface of the pavers.
- Safety equipment: Wear protective gear such as gloves, safety glasses, and a mask to ensure personal safety during the cleaning, sanding, and sealing processes.
With these materials and tools at hand, you are ready to begin the process of cleaning, sanding, and sealing your pavers, ensuring they remain in top condition for years to come.
Step 1: Preparing The Pavers For Cleaning

Inspecting The Pavers For Any Damage Or Repairs Needed
Before starting the cleaning process, it’s important to thoroughly inspect the pavers for any signs of damage or repairs that may be needed. Here are the key points to keep in mind:
- Look for any cracks or chips in the pavers. These can worsen over time and may need to be fixed before sealing them.
- Check for any loose or uneven pavers. If any are found, they should be repositioned and properly set in place.
- Take note of any weeds or moss growing between the pavers. These can be indicators of underlying issues that may need to be addressed.
Clearing The Area Of Debris And Loose Dirt
Once the pavers have been inspected and any necessary repairs identified, it’s time to prepare the area for cleaning. Follow these steps to clear the area of debris and loose dirt:
- Remove any furniture, plants, or objects from the paver surface. This will ensure a clear space for cleaning and prevent any potential damage or obstructions.
- Use a broom or leaf blower to sweep away any loose dirt, leaves, or debris on the pavers. Pay special attention to the joints and crevices between the pavers, as dirt and debris tend to accumulate there.
- For stubborn dirt or stains, consider using a pressure washer or a garden hose with a high-pressure nozzle attachment to spray away the grime. However, be careful not to use excessive pressure, as this can damage the pavers.
Taking Necessary Precautions To Protect Surrounding Surfaces And Vegetation
Before beginning the cleaning process, it’s essential to take the necessary precautions to protect surrounding surfaces and vegetation. Here’s what you need to do:
- Cover nearby plants and flowers with plastic sheeting or tarps to shield them from any cleaning chemicals or excessive water.
- If there are any delicate surfaces or objects nearby, such as windows or outdoor furniture, consider covering or relocating them to prevent any accidental damage.
- Take into account any adjacent surfaces, such as concrete or wood, that may be affected by cleaning solutions. Apply a protective sealant or tape to these areas to avoid any potential damage.
Remember, proper preparation is key when it comes to cleaning and sealing your pavers. By inspecting the pavers, clearing the area of debris, and taking necessary precautions, you can ensure a successful and efficient cleaning process. Stay tuned for the next steps in our guide on how to clean sand and seal pavers.
Step 2: Cleaning Pavers: Removing Stains And Dirt
Choosing The Appropriate Cleaning Method Based On The Paver Type
Pavers come in a variety of materials, and selecting the appropriate cleaning method is essential to ensuring their longevity and appearance. Here are some key points to consider when choosing the right cleaning method for your specific paver type:
- Concrete pavers: Concrete pavers are durable and can withstand high-pressure cleaning methods. Consider using a pressure washer for effective deep cleaning.
- Brick pavers: Brick pavers are more delicate compared to concrete. Using a pressure washer on high settings may damage them. Instead, opt for gentler cleaning solutions and techniques to prevent any harm.
- Stone pavers: Stone pavers, such as granite or travertine, require special care due to their porous nature. Avoid using harsh chemicals or high-pressure methods that could cause discoloration or erosion. Stick to milder cleaning solutions and techniques designed specifically for stone surfaces.
- Interlocking pavers: Interlocking pavers are typically made of concrete or brick and can handle pressure washing. However, be cautious when using high-pressure settings, as they can dislodge or shift the pavers. Adjust the pressure accordingly to prevent any potential damage.
Remember to always refer to the manufacturer’s recommendations for cleaning and maintenance of your specific paver type. This will ensure that you choose the most suitable cleaning method and avoid any unwanted consequences.
Using A Pressure Washer For Deep Cleaning
When it comes to a thorough cleaning of your pavers, a pressure washer can be a highly effective tool. Here are some key points to consider when using a pressure washer:
- Equipment selection: Choose a pressure washer with an appropriate psi (pounds per square inch) rating for your paver type. Higher psi may be suitable for more robust materials like concrete, while gentler settings are recommended for delicate surfaces such as brick or stone.
- Preparation: Before using a pressure washer, clear the area of any loose debris or obstructions. Sweep the pavers to remove loose dirt and sand, ensuring a cleaner and more efficient pressure-washing process.
- Technique: Hold the pressure washer nozzle at a consistent distance from the paver surface, typically around 1-2 feet away. Start with lower pressure settings and gradually increase as needed, testing a small inconspicuous area first. Use sweeping motions to ensure even coverage and avoid concentrated areas of high pressure.
- Safety measures: Wear protective gear, such as safety glasses and gloves, to avoid injury from debris or high-pressure water spray. Also, be mindful of nearby delicate plants, as the force from the pressure washer can damage or uproot them.
Alternative Cleaning Solutions For Delicate Paver Surfaces
If your pavers are more delicate or you prefer to use alternative cleaning methods, several options are available. Here are some key points to consider when opting for alternative cleaning solutions:
- Mild soaps or detergents: For gentler cleaning, mix mild dish soap or specialized paver cleaners with water. Apply the solution to the paver surface and scrub using a soft-bristled brush. Rinse thoroughly to remove any residue.
- White vinegar and water: Create a solution of white vinegar and water in a 1:1 ratio. Apply the mixture to the stained areas and scrub with a brush. Rinse thoroughly to prevent any lingering vinegar odor.
- Baking soda paste: Create a paste by mixing baking soda with water and applying it directly to stubborn stains. Let the paste sit for some time before scrubbing with a brush. Rinse off the area with water afterward.
- Pressure washer with low-pressure setting: If using a pressure washer, adjust the settings to the lowest pressure possible, especially for delicate surfaces. This helps minimize the risk of damage while still providing a deeper clean.
Remember to test any cleaning solution or method on a small, inconspicuous area first to ensure it does not cause any adverse effects. Always follow the manufacturer’s recommendations for cleaning and maintenance to keep your pavers looking their best.
Step 3: Sanding Pavers: Restoring Stability And Uniformity
Understanding The Importance Of Sand In Maintaining Paver Integrity
Sand plays a critical role in ensuring the stability and durability of your pavers. Here are a few key points to keep in mind:
- The sand acts as a bedding material that helps level the pavers and keep them in place. It provides a solid foundation for the pavers to rest on and prevents them from shifting or sinking.
- One of the main advantages of using sand is its ability to absorb shock and distribute the weight evenly across the surface. This helps reduce the risk of pavers cracking or breaking under pressure.
- Sand also helps to fill in the gaps between the pavers, creating a uniform and visually pleasing look. It prevents weeds and grass from growing in between the pavers, thereby reducing the maintenance required.
- Another important function of sand is to allow for proper drainage. It allows water to flow through the gaps between the pavers, preventing water buildup and potential damage.
Dry Vs. Wet Sanding Techniques And Their Pros And Cons
When it comes to sanding pavers, you have two main techniques to choose from dry sanding and wet sanding. Let’s explore the pros and cons of each:
Dry sanding:
- Dry sanding involves spreading dry sand over the paver surface and sweeping it into the gaps. This technique is particularly suitable for smaller areas or when you want to achieve a more immediate result.
Pros of dry sanding:
- It is a quicker method compared to wet sanding since there is no need to wait for the sand to dry.
- The process is relatively straightforward and can be done without any special equipment.
Cons of dry sanding:
- Dry sanding may not produce as uniform results as wet sanding, especially for larger areas.
- It may be more challenging to ensure that the sand is evenly distributed and properly fills the gaps.
Wet sanding:
- Wet sanding involves applying water to the paver surface, which creates a slurry when mixed with the sand. The slurry is then swept into the gaps, providing a more secure and long-lasting bond.
Pros of wet sanding:
- Wet sanding offers better stability and durability since the water helps to solidify the sand and create a stronger bond.
- It ensures more uniform results and better filling of the gaps, resulting in a cleaner and more polished finish.
Cons of wet sanding:
- Wet sanding requires additional time for the sand to dry before the area can be used.
- It may require more effort and equipment, such as a power washer, to thoroughly clean the paver surface before applying the sand.
Applying Sand Evenly And Filling In The Gaps Between Pavers
Now that you understand the importance of sanding pavers and the different techniques available, let’s delve into the process of applying sand evenly and filling in the gaps. Here are some crucial points to consider:
- Start by cleaning the paver surface thoroughly to remove any dirt, debris, or weeds. This ensures a clean and smooth base for the sand.
- Once the surface is clean, choose your preferred sanding technique, whether it is dry sanding or wet sanding.
- If you opt for dry sanding, spread the dry sand evenly over the paver surface using a broom or a mechanical spreader. Then, sweep the sand into the gaps, making sure to fill each gap completely.
- For wet sanding, dampen the paver surface with water before applying the sand. Mix the sand and water to create a slurry and pour it over the pavers. Use a broom or a squeegee to sweep the slurry into the gaps, ensuring that each gap is well-filled.
- After sanding, use a compactor or tamper to firmly press the pavers down and settle the sand. This helps to ensure stability and longevity.
- Finally, inspect the paver surface and add more sand if needed to fill any remaining gaps or uneven areas.
By following these steps and applying sand properly, you’ll restore stability and uniformity to your pavers, keeping them in excellent condition for years to come.
Step 4: Sealing Pavers: Enhancing Appearance And Protection
Now that you have cleaned your pavers and they are looking fresh and ready, it’s time to take the next step in the process – sealing them. Sealing pavers not only enhance their overall appearance but also provides much-needed protection against dirt, stains, and weather damage.
Here’s everything you need to know about sealing pavers:
Exploring Different Types Of Sealants And Their Benefits
When it comes to choosing a sealant for your pavers, there are several options available. Each type of sealant offers varying benefits and protection levels. Here are some common sealants and their advantages:
- Acrylic sealers: These sealers create a protective layer on the pavers’ surface, preventing water penetration and enhancing color. They provide a glossy or matte finish, depending on your preference.
- Polyurethane sealers: Known for their durability, polyurethane sealers offer excellent protection against foot traffic and UV rays. They are ideal for high-traffic areas like driveways and pathways.
- Silane/siloxane sealers: These sealers penetrate the pavers’ surface, forming a water-repellent barrier without altering the appearance. They are great for retaining the natural look of your pavers.
- Epoxy sealers: Offering superior strength and resistance to chemicals, epoxy sealers are perfect for pavers exposed to harsh elements or heavy use. They provide a high-gloss finish.
- Natural look sealers: If you prefer a sealant that doesn’t alter the pavers’ appearance, natural look sealers are a great option. They protect against stains and water damage while keeping the pavers looking untouched.
Remember to choose a sealant that suits your specific needs and desired outcome for your pavers.
Preparation Before Applying The Sealant
Before you dive into applying the sealant, proper preparation is key to achieving the best results. Follow these steps to ensure a successful sealing process:
- Clean the pavers: Thoroughly clean the pavers, removing any dirt, debris, stains, or moss. This will ensure that the sealant adheres properly to the surface.
- Allow the pavers to dry: After cleaning, allow the pavers to completely dry. Avoid sealing wet or damp pavers, as it may affect the effectiveness of the sealant.
- Check the weather: Make sure to choose a day with ideal weather conditions for sealing. Avoid sealing during rain or extreme temperatures, as it can impact the drying process.
Applying Sealant With The Right Tools And Techniques
Now that you are ready to apply the sealant, it’s important to use the right tools and techniques for a flawless finish. Follow these steps for a successful sealing process:
- Choose the right applicator: Depending on the type of sealant you have selected, choose an appropriate applicator. Common options include rollers, sprayers, brushes, or squeegees.
- Apply in thin coats: Apply the sealant in thin, even coats, ensuring that you cover the entire surface of the pavers. Avoid applying the sealant too thickly, as it can result in a sticky or uneven finish.
- Follow the manufacturer’s instructions: Always refer to the manufacturer’s instructions for the specific sealant you are using. They will provide guidance on drying time, reapplication, and any additional steps required.
- Allow for proper drying time: After applying the sealant, allow sufficient drying time before walking or placing any objects on the pavers. This will ensure that the sealant sets properly and provides maximum protection.
By following these steps and selecting the right sealant, you can enhance the appearance of your pavers and ensure their long-lasting protection. Sealing pavers not only adds beauty to your outdoor space but also extends the lifespan of your investment.
Tips And Tricks For Effortlessly Cleaning, Sanding, And Sealing Pavers

Keeping your pavers clean, sanded, and sealed is essential for maintaining their beauty and longevity. By following a few tips and tricks, you can effortlessly enhance their appearance and protect them from wear and tear. Let’s explore some easy-to-implement techniques that will keep your pavers looking pristine for years to come.
Maintaining A Regular Cleaning Schedule To Prevent Heavy Buildup
Regular cleaning is the key to preventing heavy buildup on your pavers. By incorporating a consistent cleaning routine into your maintenance plan, you can easily remove dirt, debris, and stains. Here are some tips to help you establish a regular cleaning schedule:
- Sweep or use a leaf blower to remove loose dirt and debris from the pavers.
- Use a mild detergent mixed with water to scrub away stains and spills.
- Rinse the pavers thoroughly with water to remove any soap residue.
- Consider power washing for a deeper clean, but be cautious and use a low-pressure setting to avoid damaging the pavers.
By staying proactive with your cleaning efforts, you can effectively prevent the accumulation of dirt and grime, keeping your pavers looking fresh and inviting.
Preventing Mold And Weed Growth Between Pavers
Mold and weeds can quickly ruin the appearance of your paver surface, so it’s crucial to take preventive measures to keep them at bay. Here are some tips to help you prevent mold and weed growth between pavers:
- Regularly inspect the paver joints for any signs of mold or weed growth.
- Remove any visible mold using a solution of equal parts vinegar and water.
- To prevent future mold growth, apply a paver sealer specifically designed to inhibit mold and mildew growth.
- Fill the paver joints with polymeric sand, which prevents weed growth and enhances stability.
By being proactive in preventing mold and weed growth, you can maintain the pristine look of your paver surface and minimize the need for costly repairs or replacements.
Protecting The Sealer From Premature Wear And Damage
Sealing your pavers is an effective way to protect them from moisture, stains, and fading. However, it’s crucial to take steps to ensure the sealer lasts as long as possible. Here are some tips for protecting the sealer from premature wear and damage:
- Avoid using harsh chemicals or abrasive cleaners on the pavers, as they can strip away the sealer.
- Use mats or rugs in high-traffic areas to protect the pavers from excessive wear.
- Avoid dragging heavy furniture across the paver surface, as it can scratch or damage the sealer.
- Periodically inspect the sealed surface for any signs of wear or damage and reapply the sealer as needed.
By following these tips, you can extend the lifespan of the sealer and maintain the protective barrier it provides to your pavers.
Remember, by maintaining a regular cleaning schedule, preventing mold and weed growth, and protecting the sealer, you can effortlessly clean, sand, and seal your pavers, keeping them looking beautiful for years to come. So roll up your sleeves, follow these tips, and enjoy the stunning results of your paver maintenance efforts!
FAQ
How Do You Clean Pavers Naturally?
To clean pavers naturally, mix vinegar and water in equal parts and scrub the surface using a brush.
What Is The Best Way To Seal Pavers?
For the best results, clean the paver surface thoroughly, apply a high-quality sealer evenly, and allow it to dry completely.
How Often Should You Seal Your Pavers?
It is recommended to seal your pavers every 2 to 3 years to maintain their appearance and protect them from weather damage.
Conclusion
Maintaining and rejuvenating your pavers doesn’t have to be a daunting task. By following these simple steps, you can easily clean and seal your pavers, ensuring they look stunning for years to come. Start by removing any debris or loose sand from the surface using a broom or blower.
Next, wash the pavers with a solution of water and mild detergent, using a brush to scrub away any tough stains. After thoroughly rinsing, allow the pavers to completely dry. Once dry, re-sand the joints using polymeric sand and sweep away any excess.
Finally, apply a high-quality sealer to protect the pavers from weathering, stains, and fading. Don’t forget to regularly maintain your pavers by cleaning them and resealing them every few years. With these simple steps, you can enjoy a beautiful, well-maintained patio or driveway for years to come.
Hey there! I’m Wilfred Holguin, your Home Clean Expert blogger. I’m on a quest to help you conquer the clutter in your home and embrace the joys of a tidy home.


