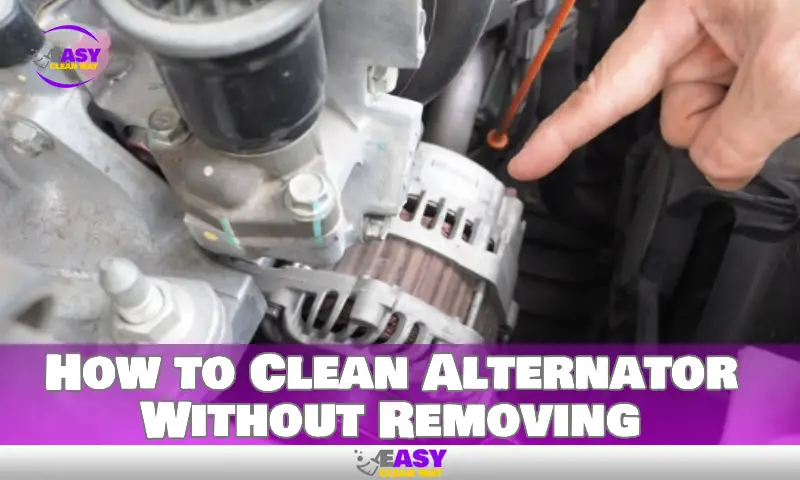
Is your vehicle’s alternator looking grimy? Over time, dirt, grease, and debris can build up on an alternator, negatively affecting its performance. But removing the alternator to clean it can be a big job. The good news is that you can often clean an alternator in place without needing to take it out of the vehicle. In this blog post, I’ll explain how to safely clean an alternator while it’s still installed using common supplies like brake cleaner, electrical contact cleaner, rags, and brushes. You’ll learn effective techniques to dissolve grease, remove filth, and restore your alternator to like-new condition. With some simple steps, you can clean your alternator and get it running optimally again without the headaches of removal.
Understanding The Importance Of An Alternator
An alternator plays a crucial role in a vehicle’s functioning by converting mechanical energy into electrical energy. It supplies power to the battery and electrical components, ensuring proper operation. Neglecting the cleanliness of the alternator can have adverse effects on vehicle performance.
Accumulated dirt, dust, and debris can hinder the alternator’s efficiency, leading to diminished power output and increased strain on the engine. This can result in reduced battery charging, poor electrical system performance, and even engine stalling. Cleaning the alternator without removing it is a simple yet important maintenance task.
Regularly removing debris with a soft brush or compressed air can prevent damage and prolong the life of the alternator. It’s crucial to remember that a clean alternator contributes to optimum vehicle performance and overall reliability. So, make sure to include it in your regular maintenance routine for a smooth and trouble-free driving experience.
Identifying Signs Of A Dirty Alternator

A dirty alternator can cause several noticeable symptoms. A visual inspection of the alternator can reveal built-up dirt and grime, which is a common sign of a dirty alternator. Other common symptoms include dimming headlights, a weak battery, electrical issues, and a burning smell.
If you notice any of these signs, it is important to clean the alternator to ensure its proper functioning. Cleaning the alternator without removing it requires caution and precision. Start by disconnecting the battery to avoid any electrical damage. Gently clean the alternator using a soft brush and a cleaning solution.
Be careful not to damage any delicate parts. Once cleaned, reassemble everything and reconnect the battery. Regularly cleaning your alternator can help extend its lifespan and prevent any potential issues down the line.
Gathering The Necessary Tools And Materials
To clean the alternator without removing it, you’ll need the necessary tools and materials. Start by gathering the tools required for the cleaning process. These could include a toothbrush, a small paintbrush, a compressed air canister, and a wrench. Additionally, you’ll need some cleaning materials and solutions to effectively remove dirt and grime.
It is recommended to use a degreaser or electrical contact cleaner along with a clean cloth or paper towel. Make sure to have a well-ventilated work area and follow safety precautions. Take the necessary steps to protect the electrical components and connections while cleaning.
Remember to avoid any excess moisture or liquid near the alternator. With the appropriate tools and materials on hand, you can successfully clean the alternator without the need for removal.
Ensuring Safety Precautions
To clean the alternator without removing it, safety precautions are essential. Firstly, disconnect the battery to prevent any electrical mishaps. This simple step ensures your safety. Additionally, it is crucial to protect sensitive components while cleaning the alternator. Avoid using harsh chemicals or excessive water, as this can damage the alternator.
Instead, use a soft cloth or brush to gently remove dust and dirt. Take extra care around the wiring and connectors to prevent any damage. By following these guidelines, you can effectively clean your alternator without the need for removal, ensuring both your safety and the proper functioning of your vehicle.
Accessing The Alternator
Locating the alternator in the vehicle engine compartment can be a bit tricky, but it is essential to access it properly for cleaning. Make sure to remove any obstacles that might be blocking your way, such as cables or other components.
Once you have a clear path, you can proceed with the cleaning process without removing the alternator. Be gentle and cautious while cleaning to avoid any damage to the delicate parts. Use a soft cloth or brush to wipe away any dirt or debris.
Pay special attention to the electrical connections, as they can get corroded over time. Cleaning the alternator regularly will help maintain its performance and prolong its lifespan.
Removing Loose Debris
To clean your alternator without removing it, start by removing any loose debris. Use compressed air or a soft brush to effectively remove dirt and debris from hard-to-reach areas and crevices. Be thorough in your cleaning process to ensure the optimal performance and longevity of your alternator.
By following these steps, you can maintain the efficiency of your alternator without the hassle of removing it. Keep in mind to regularly clean your alternator to prevent build-up and potential damage. With proper care and maintenance, your alternator will continue to function effectively and provide power to your vehicle’s electrical system.
Cleaning With A Non-Conductive Cleaner
Cleaning an alternator without removing it is possible by using a non-conductive cleaner. To do this, select a cleaner that is suitable for alternator cleaning. Apply the cleaner to a cloth or brush and gently wipe the surface of the alternator.
This method helps remove dirt, dust, and other debris that can accumulate on the alternator over time. By following this cleaning process, you can maintain the performance and longevity of your alternator without the need for removal. Keep in mind that you should use a non-conductive cleaner that is safe for electrical components to avoid any damage.
Regular cleaning of your alternator can help prevent issues and ensure the optimal functioning of your vehicle’s electrical system.
Removing Stubborn Stains And Grease
To remove stubborn stains and grease from your alternator without removing it, try using a specialized cleaner or degreaser. Apply the cleaner to the affected areas and gently scrub with a brush or cloth. This will help break down the stains and grease, making them easier to remove.
Take care not to use any abrasive materials that could damage the alternator. Once you have finished cleaning, wipe away any excess cleaner and allow the alternator to dry thoroughly before reconnecting it. Remember to follow any safety precautions provided by the manufacturer and consult your vehicle’s manual for specific instructions.
Regular cleaning and maintenance of your alternator will help prolong its lifespan and ensure optimal performance.
Drying The Alternator
Drying the alternator is crucial for successful cleaning. Make sure to allow the alternator to air dry completely before reassembling the components. In cases of urgency, you can utilize compressed air for quicker drying. This will expedite the process and ensure that no moisture is left behind that could potentially damage the alternator.
Proper drying is essential to prevent any issues that may arise from residual moisture. By following these steps, you can clean the alternator without having to remove it, saving time and effort. Protect your vehicle’s alternator by ensuring it is thoroughly dry before putting everything back in place.
Final Inspection And Reassembly
Inspecting the cleaned alternator is crucial to ensure there is no remaining dirt or residue. This step involves a thorough visual examination, checking for any spots or debris missed during the cleaning process. Reassembling any components that were removed for cleaning is the next important step.
Carefully putting everything back together ensures the alternator operates properly once it is reinstalled in the vehicle. Pay close attention to properly aligning and fastening each component, following the manufacturer’s guidelines. Take your time during this process to avoid any mishaps or damage.
Once the reassembly is complete, conduct a final inspection to guarantee everything is in its correct place. Following these steps will help you clean your alternator without having to remove it from the vehicle, saving you time and effort.
Testing The Alternator

Testing the alternator’s functionality is crucial after reconnecting the battery. Verifying its improved performance post-cleaning is a necessary step. By testing the alternator, you can ensure that it is functioning optimally without needing to remove it. This process involves checking the output voltage to ensure it falls within the manufacturer’s specified range.
Additionally, you can examine the charging system to ensure proper functionality. If any issues are detected, further troubleshooting may be necessary to identify the exact cause. Performing these tests will help you determine if cleaning the alternator has effectively resolved any performance issues.
It’s important to regularly test the alternator to ensure your vehicle’s electrical system is in top shape.
Regular Maintenance Tips To Keep The Alternator Clean
Regular maintenance is crucial to keeping the alternator clean and functioning efficiently. To avoid dirt buildup, you need to implement preventive measures. This includes adhering to the recommended maintenance intervals for cleaning the alternator. By doing so, you can maintain its performance and prolong its lifespan.
Cleaning the alternator without removing it can be done using specialized tools and techniques. It is important to carefully follow the manufacturer’s instructions to prevent any damage to the alternator. Regularly inspecting the alternator for dirt or debris accumulation is also essential.
By taking proactive steps to keep the alternator clean, you can ensure its optimal performance and avoid potential issues down the line.
FAQ
How Can I Clean An Alternator Without Removing It?
To clean an alternator without removing it, start by spraying electrical contact cleaner onto the exterior surface. Then, use a brush to remove any dirt or debris. Finally, wipe the area clean with a dry cloth.
What Are The Risks Of Removing An Alternator?
Removing an alternator can be risky as it requires disconnecting electrical connections. Mishandling these connections can result in damage to the vehicle’s electrical system or injury to the individual performing the task.
Can I Clean An Alternator With A Toothbrush?
Yes, a toothbrush can be used to clean an alternator. Gently scrub the surface and hard-to-reach areas to remove dirt and grime. Make sure to use a toothbrush with soft bristles to avoid any damage to the alternator.
How Often Should I Clean My Alternator?
Cleaning your alternator depends on various factors, such as the environment and driving conditions. As a general guideline, it is recommended to clean the alternator every 6-12 months or if you notice a significant buildup of dirt or debris.
Conclusion
To summarize, cleaning your alternator without removing it is a practical solution for maintaining optimal performance and extending its lifespan. By following the step-by-step process outlined in this blog post, you can effectively remove dirt, debris, and corrosion buildup from the alternator, allowing it to function at its best.
Regular cleaning will help prevent electrical issues and ensure the smooth operation of your vehicle’s charging system. Remember to exercise caution and consult your vehicle’s manual for specific instructions and safety guidelines. Taking care of your alternator not only saves you money on repairs or replacements but also enhances the overall efficiency of your vehicle.
So, make it a routine to clean your alternator regularly and enjoy worry-free driving experiences. Keep your alternator in top shape and avoid potential breakdowns with this simple yet effective maintenance task.
Hey there! I’m Alton Smith, your Clean Expert blogger. I’m on a quest to help you conquer chaos and embrace the joys of a tidy life.